Considering the online threats in today’s time, it is always best to keep a backup of your Yandex emails. Doing so is helps you in having access to your emails even if your Yandex Mail account gets hacked. One of the ideal ways to safeguard your emails is by forwarding them to another email address. Not only it helps keep your emails safe but also lets you easily access your incoming emails from a single mailbox.
To know how you can configure your Yandex Mail account to automatically send incoming emails to another email address as well, follow the step-by-step instructions provided below.
Steps to Forwarding Yandex Emails Automatically to Another Email Address
1.) Sign in to your Yandex Mail account and click on the Settings option (Gear icon) located on the top-right corner of your account.
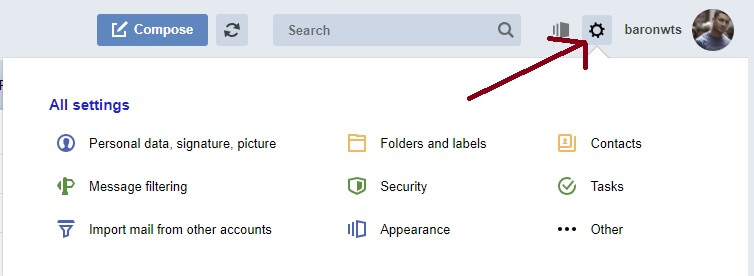
2.) From the drop-down menu that appears on your screen, click on the “Message filtering” option. You will be directed to the Incoming mail filters page.

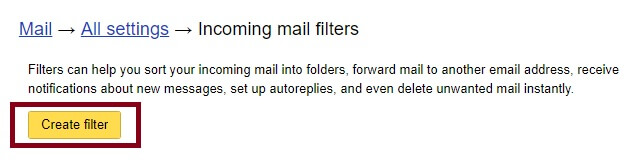
3.) On this page, click on the “Create filter” option highlighted in yellow. Clicking on this button will open a small form to fill for creating a new filter.
4.) Start with “IF” section, and make appropriate changes as per parameters to determine the emails you wish to filter.
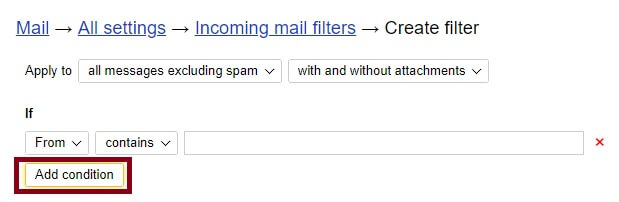
5.) Next, you will need to click on the Add condition option if you wish to include more conditions for filtering emails. In case you added more condition, you will need to choose from one of the options – “Matches at least one of the conditions” and Matches all of the conditions. These options will be located just below the “If” word.

6.) Then in the “Take the following action” section, you will need to select the options to configure the action you want to set up for the incoming emails.
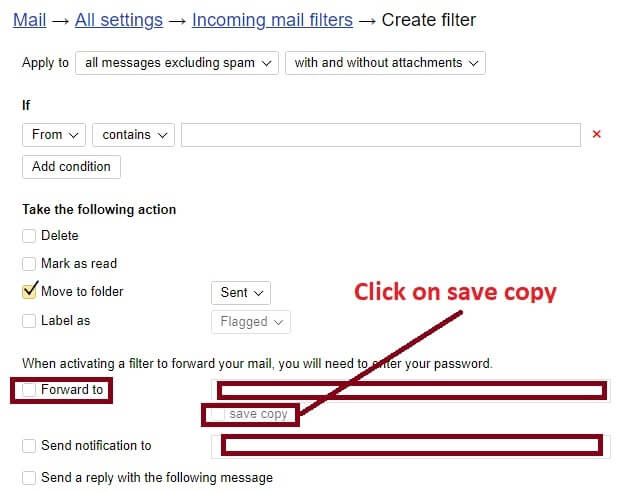
7.) After that, you will need to enter the email address in the “Forward to” field where you wish to forward the incoming emails. under “Forward to” field. Also, make sure to select the checkbox next to “save copy” option if you wish to save a copy of the emails in your Yandex.Mail account.
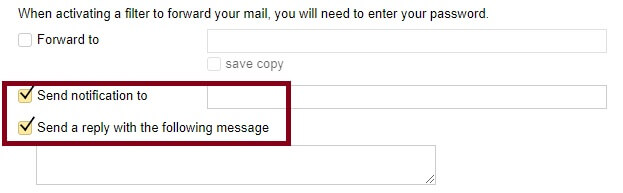
NOTE: You may also need to enter your password in this step.
8.) If you want, you can also enable the option to send notification by selecting the checkbox next to Send notification to and enter the information in it. Moreover, you can also create a message by selecting the checkbox next to the option “Send a reply with the following message” and entering the message in the field below it.

Once you are done following the above steps, click on the Create filter button. Your Yandex.mail account will be configured to automatically forward the emails to another email address.
NOTE: Only future incoming emails will be forwarded to another email address and not the existing emails in your account including Sent, Draft, or Outgoing folder.