Working under the umbrella of Armstrongcompany, a major northeastern cable, internet service provider, and telecommunications, zoominternet.net, popularly known as Zoom Internet allows and facilitates users by rendering them a wide range of services including mail, telecommunication, news, etc. If you are using the company’s services, you will like to go through the steps below to complete the Zoom Internet email login.Apart from completing the steps to log in, you will read the benefits of using Zoom Internet email login, how to sign up for Zoom Internet webmail, and recovering forgotten Zoom Internet email password.
Benefits of Availing Zoom Internet Email Login Service
So, why should you use the Zoom Internet webmail service? Amongst the most important benefits of using Zoom Internet webmail include –
- The easiest and fastest way to send and receive emails
- User-friendly navigation
- Convenient to access files, messages, etc.
- Friendly and knowledgeable customer support representatives
- Resetting password is easy and hassle-free
These are a handful of benefits that you are going to avail of yourself when you sign up for the Zoom Internet webmail service.
How to Sign up or Register on ZoomInternet.net Webmail?
Here’s a rundown of steps to register on Zoom Internet –
- Launch your web browser and go to the website to complete the registration process. (You can click here for a direct link.)
- Look for the option that says “Register for ArmstrongOneWire.com”.
- There you go! You will now have a registration form. You need to complete this form by providing all the required details, such as your full name, DOB, etc.
- Create a username and a strong password.
- After entering all the relevant information, you need to confirm your registration.
- A verification link will be sent to your primary email address. Click on the link to confirm the verification and then complete the registration process.
Step-by-Step Instructions for Zoom Internet Email Login
You can follow the steps exactly mentioned and complete the Zoom Internet email login process.
- Once the registration process is over and you got your login credentials, you need to visit the official website of Zoom Internet email login.
- You will see the sign-in option right on the page. You should be ready with the username and password beforehand.
- Enter the username and password in the required fields and click “Sign in”.
- In the next window, you can customize your settings. It is easy.
- If you wish to change your password after the first login, you can do that too.
- Now that you know how to login and make the most out of this email service from Armstrong, you can access your email account from anywhere and at any time.
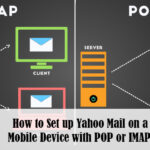
ZoomInternet.net Email Server Settings (POP and SMTP)
Want to know whether you can configure your Zoom Internet email account on any email clients? Yes, you can setup your account on any popular email client and continue to receive and send emails. Check the email server details –
Zoom Internet POP (Incoming) Mail Server Settings –
|
Account Type |
POP |
|
Username |
Your username is your email address |
|
Password |
Your email address password |
|
Server hostname |
Pop3.zoominternet.net |
|
Server Port |
110 |
|
SSL/ TLS |
No |
|
Authentication Required? |
Yes |
Zoom Internet SMTP (Outgoing) Mail Server Settings –
|
Account Type |
SMTP |
|
Username |
Your username is your email address |
|
Password |
Your email address password |
|
Server hostname |
smtp.zoominternet.net |
|
Server Port |
25 |
|
SSL/ TLS |
No |
|
Authentication Required? |
Yes |
Zoom Internet Email Settings for iPhone
If you use an iPhone and want to access your Zoom Internet emails on it, here’s how you can send and receive Zoom Internet emails on your Apple phone.
- Go to the “Settings” option on your phone.
- Scroll down and touch the option “Mail, Contacts and Calendars”.
- If you don’t see your email provider, you need to tap “Add Account”.
- Select “Add Mail Account” and provide the details as mentioned below –
- Name: Your name
- Email Address: Your username is your email address
- Password: Enter your Zoom Internet password
- Description
- Tap the “Next” button and enter details under incoming mail server –
- Hostname: pop3.zoominternet.net
- Username: Your Zoom Internet username
- Password: Your password
- Now, enter details under outgoing mail server –
- Hostname: smtp.zoominternet.net
- Username: Your Zoom Internet username
- Password: Your password
- Press the “Save” button.
- Next, you need to go to “Settings” > “Your Zoom Internet Account” > “Advanced”.
- Under “Incoming settings”, you need to provide the following details –
- Use SSL: None
- Server Port: 110
- Authentication: Password
- Under “Outgoing settings“, you need to provide the following details –
- Use SSL: None
- Server Port: 25
- Authentication: Password
That’s it! You have completed the configuration process on your iPhone.